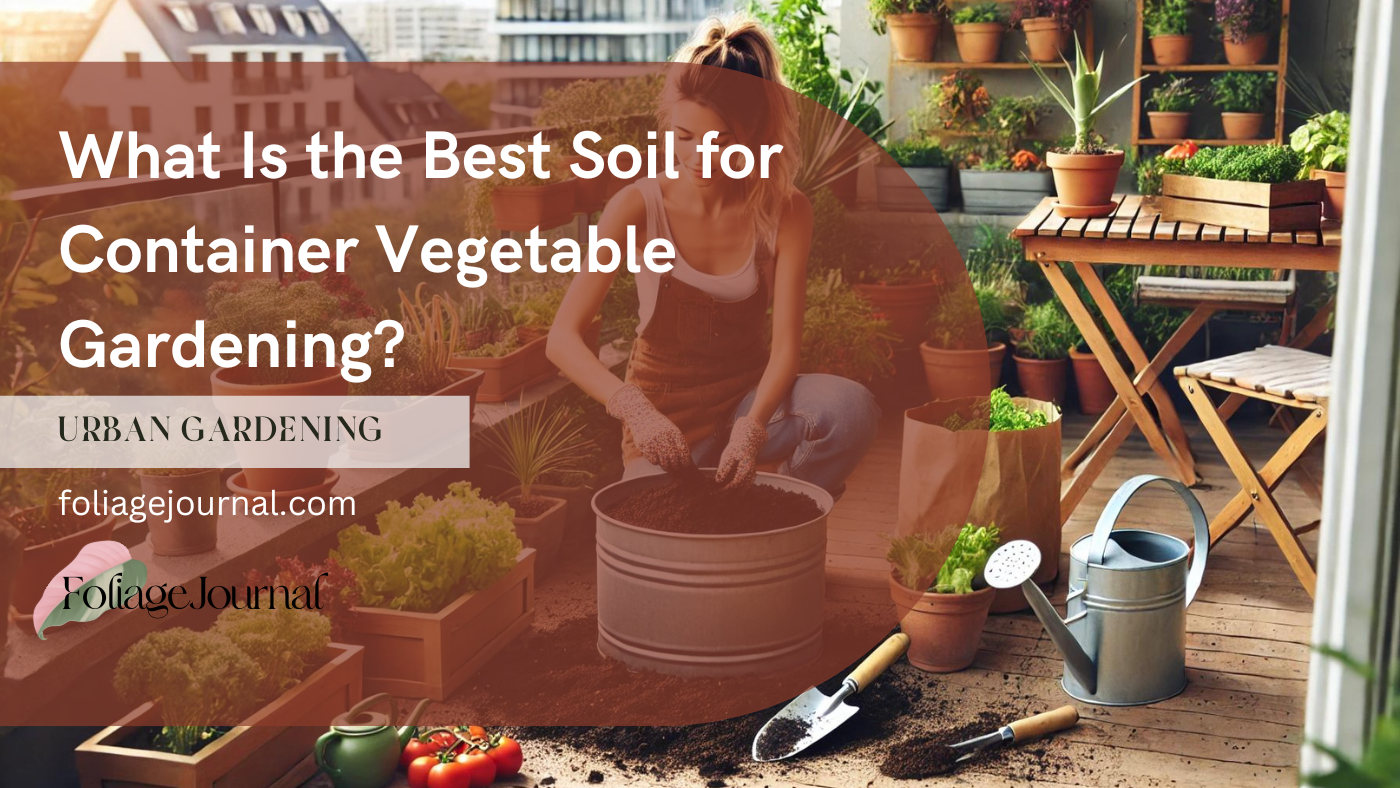
Are you dreaming of harvesting fresh, juicy tomatoes or crisp lettuce right from your balcony or patio? Container vegetable gardening might be your ticket to homegrown goodness, even in the tiniest of spaces. But here’s the kicker: your veggies are only as good as the soil they’re growing in. So, what is the best soil for container vegetable gardening? Buckle up, green thumbs, because we’re about to dig deep into this crucial question!
Container gardening isn’t just a trend; it’s a game-changer for urban dwellers, apartment enthusiasts, and anyone short on garden space. But don’t be fooled – growing veggies in pots isn’t as simple as dumping some dirt in a container and calling it a day. The secret to lush, productive container gardens lies beneath the surface: in the soil itself.
In this comprehensive guide, we’ll unearth everything you need to know about choosing the best soil for your container vegetable garden. We’ll explore why regular garden soil just won’t cut it, dive into the perfect soil recipe for potted veggies, and share pro tips to keep your plants thriving. Whether you’re a seasoned container gardener or just getting your hands dirty for the first time, this article will equip you with the knowledge to create a thriving vegetable oasis in containers.
Ready to transform your container garden from meh to marvelous? Let’s roll up our sleeves and get to the root of great container vegetable gardening soil!
- Understanding Container Gardening Basics
- The Importance of Soil in Container Vegetable Gardening
- Components of the Ideal Container Vegetable Gardening Soil
- Types of Soil Mixes for Container Vegetable Gardening
- Best Soil for Specific Vegetables in Containers
- How to Prepare the Best Soil for Container Vegetable Gardening
- Maintaining Soil Health in Container Vegetable Gardens
- Watering Practices for Optimal Soil Moisture
- Fertilizing: Types, Frequency, and Application Methods
- Mulching: Benefits and Best Practices
- Crop Rotation in Containers: Why it Matters
- Watering Practices for Optimal Soil Moisture
- Fertilizing: Types, Frequency, and Application Methods
- Mulching: Benefits and Best Practices
- Crop Rotation in Containers: Why it Matters
- Soil Rejuvenation
- Troubleshooting Common Soil Issues in Container Vegetable Gardening
- Sustainable Practices for Container Vegetable Garden Soil
- Expert Tips for Successful Container Vegetable Gardening Soil Management
- Conclusion
Understanding Container Gardening Basics
Before we dive into the nitty-gritty of soil selection, let’s take a moment to understand what container vegetable gardening is all about. After all, you’ve got to know the rules before you can break them (or in this case, grow them)!
What is container vegetable gardening?
Container vegetable gardening is exactly what it sounds like – growing veggies in pots, tubs, or any other type of container instead of in the ground. It’s like giving your plants their own little mobile homes! This method of gardening has exploded in popularity, and for good reason.
Fun Fact: Did you know that container gardening dates back to Ancient Egypt? That’s right – those pyramid builders were also pioneering patio gardens!
Benefits of growing vegetables in containers
Why bother with containers when you could just plant in the ground? Well, container gardening comes with a heaping helping of benefits:
- Space-saving: No yard? No problem! You can grow veggies on balconies, patios, or even windowsills.
- Mobility: Containers can be moved to follow the sun or dodge nasty weather.
- Pest control: It’s easier to keep critters away from potted plants.
- Soil control: You have complete control over your soil quality (which is why you’re here, right?).
- Accessibility: No more backbreaking bending – bring your garden up to your level!
- Extended growing season: You can start earlier and finish later by moving plants indoors.
Common challenges in container gardening
Now, I won’t sugarcoat it – container gardening isn’t all sunshine and homegrown tomatoes. It comes with its own set of challenges:
- Water management: Containers dry out faster than in-ground gardens.
- Temperature fluctuations: Pot soil heats up and cools down more quickly.
- Limited root space: Plants can become root-bound if the container is too small.
- Nutrient depletion: Container soil can lose nutrients faster than ground soil.
- Weight considerations: Large containers full of soil can be heavy!
But don’t let these challenges put you off! With the right soil (which we’ll get to soon, I promise) and a little know-how, you can overcome these hurdles and create a thriving container vegetable garden.
Pro Tip: Start small. Try growing herbs or lettuce in containers before tackling more demanding vegetables like tomatoes or peppers. It’s a great way to get your feet wet (but not your floors – use saucers under your pots!).
Understanding these basics sets the stage for our deep dive into soil selection. After all, knowing why container gardening is unique helps us appreciate why the soil we use is so crucial. So, are you ready to get the dirt on dirt? Let’s dig into the importance of soil in container vegetable gardening!
The Importance of Soil in Container Vegetable Gardening
When it comes to container vegetable gardening, soil isn’t just dirt – it’s the foundation of your entire green empire. Let’s break down why the best soil for container vegetable gardening is so crucial to your plant’s success.

Why soil quality matters more in containers than in-ground gardens
In-ground gardens have a secret weapon: they’re connected to a vast network of soil that extends far beyond your property lines. Container gardens? They’re islands unto themselves. Here’s why these matters:
- Limited resources: In containers, plants only have access to the nutrients and water present in that small volume of soil.
- Faster drainage: Container soil tends to drain more quickly, which can lead to nutrient leaching.
- Temperature fluctuations: Pot soil is more susceptible to temperature changes, affecting root health and nutrient uptake.
- Root confinement: Restricted root growth in containers means plants rely heavily on the available soil for all their needs.
Analogy Alert: Think of container soil like a studio apartment vs. a sprawling house. In a studio, every inch counts, and you need to make smart use of the limited space. That’s your container soil!
How the best soil for container vegetable gardening differs from regular garden soil
You might be tempted to scoop up some soil from your backyard and call it a day. But hold your horses! Regular garden soil is like a bull in a china shop when it comes to containers. Here’s why:
- Compaction: Garden soil compacts easily in containers, suffocating roots.
- Poor drainage: It often doesn’t drain well enough for container use.
- Pest potential: It may harbor pests or diseases that thrive in the confined space of a container.
- Weight: Garden soil is heavier, making containers difficult to move.
The best soil for container vegetable gardening is typically a soilless mix or a carefully crafted blend that addresses these issues.
Impact of soil on plant health, growth, and yield
Soil isn’t just where your plants hang out – it’s their lifeline. Here’s a quick breakdown of how soil affects your veggies:
| Soil Factor | Impact on Plants |
| Texture | Affects root growth and water retention |
| Nutrient content | Determines plant growth and yield |
| pH level | Influences nutrient availability |
| Water retention | Affects watering frequency and root health |
| Aeration | Impacts root respiration and overall plant health |
Remember, in container vegetable gardening, your soil isn’t just along for the ride – it’s in the driver’s seat. By understanding its importance, you’re already on your way to becoming a container gardening guru.
So, now that we know why soil is the MVP of container gardening, are you ready to learn about what goes into the best soil for your potted veggies? Let’s roll up our sleeves and get mixing!
Components of the Ideal Container Vegetable Gardening Soil
Alright, green thumbs, it’s time to get our hands dirty! The best soil for container vegetable gardening isn’t just one thing – it’s a carefully crafted cocktail of components. Let’s break down these ingredients and see why each one is crucial for your veggies’ success.
Organic Matter: The Life of the Party
Organic matter is like the life of the soil party – it brings all the good stuff and keeps things interesting. Here’s why it’s so important:
- Nutrient source: As it decomposes, organic matter releases nutrients.
- Water retention: It acts like a sponge, holding onto water for your plants.
- Soil structure: It helps prevent compaction and promotes good drainage.
Types of organic matter you can use:
- Compost
- Aged manure
- Leaf mold
- Coconut coir
Pro Tip: Aim for about 25-30% organic matter in your container mix. Too much can lead to waterlogging, while too little might leave your plants hungry.
Drainage Materials: Keeping Things Flowing
In container gardening, drainage is king. Without it, your plants’ roots could end up swimming instead of growing. Here’s why good drainage matters:
- Prevents root rot
- Ensures oxygen reaches the roots
- Helps maintain proper soil temperature
Popular drainage materials:
- Perlite
- Vermiculite
- Coarse sand
- Pine bark
Mix in about 10-20% of these materials to keep things well-drained but not too dry.
Nutrients: Feeding Your Veggie Babies
Plants, like people, need a balanced diet to thrive. The best soil for container vegetable gardening should have a good mix of:
- Macronutrients: Nitrogen (N), Phosphorus (P), and Potassium (K)
- Secondary nutrients: Calcium, Magnesium, and Sulfur
- Micronutrients: Iron, Manganese, Boron, and others
While many of these come from organic matter, you might need to supplement with slow-release fertilizers or compost teas.
Fun Fact: Plants use 17 essential elements for growth. Carbon, hydrogen, and oxygen come from air and water, while the other 14 come from the soil!
pH Levels: Finding the Sweet Spot
pH is like the Goldilocks of soil factors – it needs to be just right. Most vegetables prefer a slightly acidic to neutral pH, typically between 6.0 and 7.0.
| Vegetable | Preferred pH Range |
| Tomatoes | 6.0 – 6.8 |
| Peppers | 6.0 – 6.8 |
| Lettuce | 6.0 – 7.0 |
| Carrots | 6.0 – 6.8 |
| Beans | 6.0 – 7.0 |
Pro Tip: Invest in a soil pH tester. It’s an inexpensive tool that can save you a lot of headaches (and heartaches over wilted plants).
Remember, the best soil for container vegetable gardening is a balancing act. Too much of any one component can throw things off kilter. The key is to create a mix that provides:
- Adequate nutrition
- Excellent drainage
- Good water retention
- Proper aeration
By understanding these components, you’re well on your way to creating the perfect home for your container veggies. But how do you put it all together? Stay tuned as we explore different types of soil mixes in our next section!
Types of Soil Mixes for Container Vegetable Gardening
Now that we’ve got the basics down, let’s explore the different ways you can bring these components together. When it comes to the best soil for container vegetable gardening, you’ve got options!
Commercial Potting Mixes: The Convenient Choice
Commercial potting mixes are like the fast food of the gardening world – quick, convenient, and generally reliable. But not all mixes are created equal!
Pros:
- Ready to use right out of the bag
- Formulated to provide good drainage and aeration
- Often contain slow-release fertilizers
- Sterile, reducing the risk of pests and diseases
Cons:
- Can be expensive, especially for large containers
- Quality varies between brands
- May dry out quickly
- Some may contain synthetic fertilizers or peat moss (if sustainability is a concern)
Pro Tip: Look for mixes specifically labeled for vegetables or organic gardening. These are more likely to have the right nutrient balance for your edible plants.
Homemade Soil Mixes: The DIY Delight
For the hands-on gardener, nothing beats the satisfaction of mixing your soil. Plus, you have complete control over what goes into it!
A basic recipe for homemade container vegetable soil:
- 1 part compost
- 1 part peat moss or coconut coir
- 1 part perlite or vermiculite
Pros:
- Can be more cost-effective for large gardens
- Allows customization for specific plant needs
- You know exactly what’s in your soil
Cons:
- Requires more time and effort
- May need to experiment to get the right balance
- Ingredients can be messy to store and mix
DIY Soil Mix Variations:
- High-Drainage Mix: Increase perlite to 2 parts for plants that prefer drier conditions.
- Moisture-Retentive Mix: Add an extra half-part of peat moss or coir for thirsty plants.
- Nutrient-Rich Mix: Increase compost to 2 parts for heavy feeders like tomatoes.
Soilless Mixes: The High-Tech Option
Soilless mixes, also known as synthetic soils, are like the space-age cousins of traditional soil mixes. They’re made entirely of non-soil components.
Common ingredients:
- Peat moss or coconut coir
- Perlite or vermiculite
- Sand
- Limestone (to adjust pH)
Pros:
- Excellent drainage and aeration
- Sterile, reducing disease risk
- Lightweight, making containers easier to move
- Consistent quality
Cons:
- Often lacks nutrients, requiring more frequent fertilization
- Can dry out quickly
- May be more expensive than soil-based mixes
When to use soilless mixes:
- For starting seeds
- For plants prone to root diseases
- In hydroponic systems
Remember, the best soil for container vegetable gardening isn’t a one-size-fits-all solution. You might need to experiment with different mixes to find what works best for your specific plants and growing conditions.
Pro Tip: Whatever mix you choose, always moisten it before planting. Dry soil can repel water, making it hard for your plants to get established.
Now that we’ve covered the types of soil mixes, are you ready to get specific? In our next section, we’ll explore the best soil choices for different types of vegetables. Get ready to give your veggies the five-star soil treatment they deserve!
Best Soil for Specific Vegetables in Containers
Just like people, different vegetables have different preferences when it comes to their living conditions. Let’s explore the best soil for container vegetable gardening based on various veggie types.

Leafy Greens (Lettuce, Spinach, Kale)
Leafy greens are the easy-going roommates of the vegetable world. They’re not too picky, but they do have some preferences:
- Soil composition: Lighter mix with good water retention
- pH level: 6.0-7.0
- Special needs: Rich in nitrogen for lush leaf growth
Recipe for leafy green container soil:
- 2 parts general potting mix
- 1 part compost
- 1 part perlite
Pro Tip: Add a slow-release organic fertilizer high in nitrogen to keep your greens, well, green!
Root Vegetables (Carrots, Radishes, Beets)
Root veggies are the underground stars of your garden. They need soil that’s easy to push through:
- Soil composition: Light, loose, and well-draining
- pH level: 6.0-6.8
- Special needs: Avoid fresh manure or too much nitrogen, which can cause forking
Recipe for root vegetable container soil:
- 2 parts general potting mix
- 1 part sand
- 1 part perlite or vermiculite
Fun Fact: Carrots can sense gravity! They use this ability to grow straight down, but only if the soil allows it.
Fruiting Vegetables (Tomatoes, Peppers, Cucumbers)
These heavy feeders need a soil that’s rich in nutrients and holds moisture well:
- Soil composition: Rich, moisture-retentive mix
- pH level: 6.0-6.8
- Special needs: High in phosphorus and potassium for fruit development
Recipe for fruiting vegetable container soil:
- 2 parts general potting mix
- 1 part compost
- 1 part perlite
- 1/4 cup-balanced organic fertilizer per gallon of mix
Herbs
Herbs are the low-maintenance friends of the garden. Most prefer:
- Soil composition: Well-draining, somewhat lean mix
- pH level: 6.0-7.0
- Special needs: Many Mediterranean herbs prefer less fertile soil
Recipe for herb container soil:
- 2 parts general potting mix
- 1 part perlite
- 1 part coarse sand
Pro Tip: For herbs like rosemary and thyme, add extra perlite or sand to improve drainage.
| Vegetable Type | Water Retention | Nutrient Level | Drainage |
| Leafy Greens | High | Medium-High | Medium |
| Root Vegetables | Medium | Low-Medium | High |
| Fruiting Veggies | High | High | Medium |
| Herbs | Low-Medium | Low-Medium | High |
Remember, these are general guidelines. Some vegetables within each category may have slightly different preferences, so always research the specific needs of the varieties you’re growing.
Pro Tip: Regardless of the vegetable type, always ensure your containers have drainage holes. Even the best soil mix can’t compensate for poor drainage!
By tailoring your soil mix to your specific vegetables, you’re giving your container garden the best possible start. But creating the perfect soil is just the beginning. In our next section, we’ll explore how to prepare and maintain your soil for long-term veggie-growing success. Ready to get your hands dirty?
How to Prepare the Best Soil for Container Vegetable Gardening
You’ve got the knowledge, now it’s time for action! Let’s roll up our sleeves and get that perfect soil mix ready for your container veggies.
Step-by-step guide to mixing your container soil
-
- Gather your materials: Large mixing container (wheelbarrow or tarp)
- Measuring container (bucket or large pot)
- Gloves
- Dust mask (optional, but recommended)
- Your chosen soil components
- Measure your components: Use your basic recipe (e.g., 1 part compost, 1 part peat moss, 1 part perlite) and measure each into your mixing container.
- Mix thoroughly: Use your hands or a garden fork to blend the components. Aim for a consistent texture throughout.
- Moisten the mix: Gradually add water while mixing until the soil is evenly moist but not soggy. It should feel like a wrung-out sponge.
- Let it rest: Allow the mix to sit for a few hours or overnight. This helps the water distribute evenly.
Pro Tip: Make more than you think you’ll need. It’s better to have extra soil on hand than to run short mid-planting!
Tips for improving commercial potting mixes
Even if you’re using a pre-made mix, you can give it a boost:
- Add organic matter: Mix in 20-30% compost to increase nutrient content and improve soil structure.
- Improve drainage: If the mix feels heavy, add perlite or vermiculite (about 10-20% of total volume).
- Boost nutrients: Incorporate a slow-release organic fertilizer according to package instructions.
- Adjust pH: Use a pH test kit and add lime to raise pH or sulfur to lower it if needed.
Fun Fact: Some gardeners swear by adding mycorrhizal fungi to their soil mix. These beneficial fungi form symbiotic relationships with plant roots, potentially improving nutrient uptake and disease resistance.
Sterilizing soil: When and how to do it
Sterilizing soil can help prevent disease and pest issues, especially when reusing old potting soil.
When to sterilize:
- Reusing soil from diseased plants
- Using garden soil in containers
- Starting seeds or propagating cuttings
How to sterilize soil:
-
- Oven method: Preheat oven to 180°F (82°C)
- Spread soil in a thin layer (no more than 4 inches deep) in an oven-safe container
- Bake for 30 minutes
- Cool completely before use
- Microwave method: Place 2 pounds of moist soil in a microwave-safe container
- Microwave on high for 90 seconds per 2 pounds of soil
- Cool before use
- Solarization method: Spread soil in a black plastic bag
- Seal and place in a sunny spot for 4-6 weeks
- Turn the bag occasionally
Caution: Sterilizing soil can produce strong odors. Always ensure good ventilation!
A note on soil volume
Don’t skimp on soil volume! Adequate soil is crucial for healthy root development and nutrient availability.
| Container Size | Minimum Soil Depth |
| Small herbs | 6-8 inches |
| Leafy greens | 8-10 inches |
| Peppers, eggplants | 12-14 inches |
| Tomatoes | 14-16 inches |
| Root vegetables | 12-14 inches |
Pro Tip: When in doubt, go bigger! More soil means more resources for your plants and less frequent watering.
By following these preparation steps, you’re setting the stage for a thriving container vegetable garden. But remember, soil care doesn’t stop after planting. In our next section, we’ll explore how to maintain your soil’s health throughout the growing season. Are you ready to keep your veggie paradise flourishing?
Maintaining Soil Health in Container Vegetable Gardens
Creating the perfect soil mix is just the beginning. To keep your veggies happy and productive, you’ll need to maintain your soil’s health throughout the growing season. Let’s explore how to keep your container garden soil in tip-top shape!
Watering Practices for Optimal Soil Moisture
Water is life, but too much or too little can spell disaster for your container veggies. Here’s how to get it just right:
- Check moisture levels regularly: Stick your finger about an inch into the soil. If it’s dry, it’s time to water.
- Water deeply: When you water, do so until you see it draining from the bottom of the container.
- Use mulch: A layer of organic mulch on top of your soil can help retain moisture and regulate soil temperature.
- Consider self-watering containers: These can help maintain consistent moisture levels, especially for thirsty plants like tomatoes.
Pro Tip: Water in the morning to reduce evaporation and fungal disease risks.
Fertilizing: Types, Frequency, and Application Methods
Even the best soil for container vegetable gardening will eventually need a nutrient boost. Here’s how to keep your plants well-fed:
-
- Types of fertilizers:Organic: Compost tea, fish emulsion, seaweed extract
- Synthetic: Water-soluble or slow-release granules
- Frequency: Fast-growing plants (like leafy greens): Every 2-3 weeks
- Heavy feeders (like tomatoes): Every 1-2 weeks
- Slow growers (like root vegetables): Every 3-4 weeks
- Application methods: Liquid fertilizers: Apply directly to soil when watering
- Granular fertilizers: Sprinkle on the soil surface and water in
- Foliar feeding: Spray diluted liquid fertilizer on leaves
Mulching: Benefits and Best Practices
Mulch is like a cozy blanket for your soil. Here’s why it’s awesome and how to use it:
Benefits of mulching:
- Retains soil moisture
- Regulates soil temperature
- Suppresses weed growth
- Adds organic matter as it breaks down
Best practices:
- Apply a 2-3 inch layer of mulch on top of your soil
- Keep mulch away from plant stems to prevent rot
- Replenish mulch as it breaks down
Mulch options for containers:
- Straw
- Shredded leaves
- Wood chips
- Coconut coir
Crop Rotation in Containers: Why it Matters
You might think crop rotation is just for large gardens, but it’s important in containers too!
Benefits of crop rotation:
- Prevents nutrient depletion
- Reduces pest and disease buildup
- Improves soil structure
How to rotate crops in containers:
- Group plants by family (e.g., nightshades, legumes, brassicas)
- Avoid planting members of the same family in the same container in consecutive seasons
- Consider a three-year rotation plan
Absolutely! Let’s dive into the crucial topic of maintaining soil health in your container vegetable garden.
- Maintaining Soil Health in Container Vegetable Gardens
Creating the perfect soil mix is just the beginning. To keep your veggies happy and productive, you’ll need to maintain your soil’s health throughout the growing season. Let’s explore how to keep your container garden soil in tip-top shape!
Watering Practices for Optimal Soil Moisture
Water is life, but too much or too little can spell disaster for your container veggies. Here’s how to get it just right:
- Check moisture levels regularly: Stick your finger about an inch into the soil. If it’s dry, it’s time to water.
- Water deeply: When you water, do so until you see it draining from the bottom of the container.
- Use mulch: A layer of organic mulch on top of your soil can help retain moisture and regulate soil temperature.
- Consider self-watering containers: These can help maintain consistent moisture levels, especially for thirsty plants like tomatoes.
Pro Tip: Water in the morning to reduce evaporation and fungal disease risks.
Fertilizing: Types, Frequency, and Application Methods
Even the best soil for container vegetable gardening will eventually need a nutrient boost. Here’s how to keep your plants well-fed:
-
- Types of fertilizers:Organic: Compost tea, fish emulsion, seaweed extract
- Synthetic: Water-soluble or slow-release granules
- Frequency: Fast-growing plants (like leafy greens): Every 2-3 weeks
- Heavy feeders (like tomatoes): Every 1-2 weeks
- Slow growers (like root vegetables): Every 3-4 weeks
- Application methods: Liquid fertilizers: Apply directly to soil when watering
- Granular fertilizers: Sprinkle on the soil surface and water in
- Foliar feeding: Spray diluted liquid fertilizer on leaves
Mulching: Benefits and Best Practices
Mulch is like a cozy blanket for your soil. Here’s why it’s awesome and how to use it:
Benefits of mulching:
- Retains soil moisture
- Regulates soil temperature
- Suppresses weed growth
- Adds organic matter as it breaks down
Best practices:
- Apply a 2-3 inch layer of mulch on top of your soil
- Keep mulch away from plant stems to prevent rot
- Replenish mulch as it breaks down
Mulch options for containers:
- Straw
- Shredded leaves
- Wood chips
- Coconut coir
Crop Rotation in Containers: Why it Matters
You might think crop rotation is just for large gardens, but it’s important in containers too!
Benefits of crop rotation:
- Prevents nutrient depletion
- Reduces pest and disease buildup
- Improves soil structure
How to rotate crops in containers:
- Group plants by family (e.g., nightshades, legumes, brassicas)
- Avoid planting members of the same family in the same container in consecutive seasons
- Consider a three-year rotation plan
Here’s a simple rotation plan:
| Year 1 | Year 2 | Year 3 |
| Tomatoes (Nightshade) | Beans (Legume) | Broccoli (Brassica) |
| Lettuce (Composite) | Carrots (Umbellifer) | Peas (Legume) |
| Cucumbers (Cucurbit) | Onions (Allium) | Spinach (Amaranth) |
Pro Tip: Keep a garden journal to track your rotations and note which plants thrive in which containers.
Soil Rejuvenation
Even with the best care, container soil can become depleted over time. Here’s how to give it new life:
- Annual refreshing: At the start of each growing season, remove about 1/3 of the old soil and replace it with fresh compost.
- Biennial overhaul: Every two years, completely replace the soil in your containers.
- Winter care: In colder climates, store soil-filled containers in a protected area to prevent freeze-thaw damage.
Remember, maintaining healthy soil is an ongoing process. By staying attentive to your soil’s needs, you’re ensuring a bountiful harvest from your container vegetable garden.
Up next, we’ll tackle common soil issues that can crop up in container gardens and how to solve them. Ready to become a container garden troubleshooter?
Troubleshooting Common Soil Issues in Container Vegetable Gardening
Even with the best soil and maintenance practices, issues can arise. But don’t worry! We’ll equip you with the knowledge to identify and solve common soil problems in your container vegetable garden.
Compaction and Poor Drainage
Compacted soil is like a traffic jam for your plant roots. It can lead to poor growth and even plant death.
Signs of compaction:
- Water pools on the soil surface
- Slow plant growth
- Yellowing leaves
- Stunted root development
Solutions:
- Gently loosen the soil surface with a fork
- Mix in perlite or vermiculite to improve aeration
- Consider repotting with a lighter soil mix
Pro Tip: Avoid walking on or pressing down on your container soil. Use a light touch when planting and maintaining your veggies.
Nutrient Deficiencies: Signs and Solutions
Just like us, plants need a balanced diet. Here’s how to spot and fix common nutrient deficiencies:
| Nutrient | Signs of Deficiency | Solution |
| Nitrogen | Yellowing of older leaves | Apply high-nitrogen fertilizer or compost |
| Phosphorus | Purple leaf edges, stunted growth | Add bone meal or rock phosphate |
| Potassium | Brown leaf edges, weak stems | Apply wood ash or potassium sulfate |
| Magnesium | Yellowing between leaf veins | Sprinkle Epsom salts around plants |
| Iron | Yellowing of young leaves | Apply chelated iron or iron sulfate |
pH Imbalances: How to Test and Adjust
pH affects nutrient availability. Most vegetables prefer a slightly acidic to neutral pH (6.0-7.0).
How to test soil pH:
- Use a home testing kit (available at garden centers)
- Send a sample to a professional soil testing lab for more detailed results
Adjusting pH:
- To raise pH (make the soil more alkaline): Add garden lime
- To lower pH (make the soil more acidic): Add sulfur or aluminum sulfate
Pro Tip: Make small adjustments over time. Dramatic pH changes can shock your plants.
Pest and Disease Problems Related to Soil
Sometimes, soil issues can invite unwanted guests or lead to plant diseases.
Common soil-related pests and diseases:
- Fungus gnats: Tiny flies that thrive in overly moist soil
- Solution: Let the soil dry between waterings, use sticky traps
- Root rot: Caused by overwatering and poor drainage
- Solution: Improve drainage, avoid overwatering, consider fungicidal treatments
- Verticillium wilt: A soil-borne fungal disease
- Solution: Use resistant varieties, practice crop rotation
- Nematodes: Microscopic worms that damage roots
- Solution: Solarize soil, use nematode-resistant varieties
Natural pest control recipe: Mix 1 tablespoon of liquid dish soap and 1 cup of vegetable oil. Add 1 teaspoon of this mixture to 1 cup of water in a spray bottle. Apply to affected plants, focusing on the undersides of leaves.
Dealing with Salt Buildup
Over time, fertilizers can leave salt deposits in your container soil, which can harm plants.
Signs of salt buildup:
- The white crust on the soil surface
- Leaf tip browning
- Stunted growth
Solutions:
- Flush the soil: Water deeply until it runs freely from drainage holes
- Repot with fresh soil if buildup is severe
- Use organic fertilizers, which are less likely to cause salt buildup
Remember, the best cure is prevention. Regular soil maintenance and careful watering and fertilizing practices can help you avoid many of these issues.
Pro Tip: Keep a garden journal to track your soil’s performance and any issues that arise. This can help you spot patterns and prevent problems before they start.
By being attentive to your soil’s needs and addressing issues promptly, you’re well on your way to mastering the art of container vegetable gardening. In our next section, we’ll explore sustainable practices to keep your container garden thriving year after year. Ready to go green with your green thumb?
Sustainable Practices for Container Vegetable Garden Soil
Sustainability isn’t just a buzzword—it’s a crucial approach to gardening that benefits both your plants and the planet. Let’s explore how you can make your container vegetable gardening more eco-friendly and sustainable.
Composting for Container Gardens
Compost is like nature’s multivitamin for your soil. It’s packed with nutrients, improves soil structure, and reduces waste. Here’s how to get started:
-
- Small-space composting methods: Bokashi composting: A fermentation process that works well in small spaces
- Vermicomposting: Using worms to break down organic matter
- Countertop composting bins: Perfect for apartment dwellers
- What to compost: Fruit and vegetable scraps
- Coffee grounds and tea bags
- Eggshells
- Shredded paper and cardboard
- What to avoid: Meat and dairy products
- Diseased plants
- Weeds that have gone to seed
Pro Tip: Start with a 50/50 mix of “green” (nitrogen-rich) and “brown” (carbon-rich) materials for balanced compost.
Using Organic Amendments
Organic amendments can boost your soil’s health without relying on synthetic chemicals. Here are some eco-friendly options:
- Bone meal: High in phosphorus, great for root development
- Blood meal: Rich in nitrogen, promotes leafy growth
- Kelp meal: Packed with micronutrients and growth hormones
- Worm castings: Improves soil structure and adds beneficial microbes
DIY Organic Fertilizer Recipe: Mix equal parts:
- Blood meal
- Bone meal
- Kelp meal Add 1/4 cup of this mixture per gallon of soil when planting, or sprinkle on the soil surface monthly during the growing season.
Recycling and Reusing Container Soil
Reduce waste and save money by reusing your container soil. Here’s how:
-
- Soil rejuvenation: Remove old plant material
- Break up compacted soil
- Mix in equal parts fresh compost
- Add organic fertilizer
- Solarization: Spread used soil in a black plastic bag
- Seal and leave in a sunny spot for 4-6 weeks
- This kills pathogens and weed seeds
- Crop rotation: Use the soil for a different plant family next season
Water Conservation Techniques
Conserving water is crucial for sustainable gardening. Try these methods:
- Mulching: Apply a 2-inch layer of organic mulch to reduce evaporation
- Self-watering containers: These use a reservoir system to reduce water waste
- Drip irrigation: Delivers water directly to plant roots
- Rainwater harvesting: Collect rainwater for your containers
DIY Self-Watering Container:
- Drill holes near the bottom of a large container
- Place a slightly smaller container inside, resting on the holes
- Fill the gap between containers with soil
- Plant in the inner container
- Water through a pipe inserted into the outer container
Biodegradable Containers
Consider using eco-friendly container options:
- Coconut coir pots: Made from coconut husks, these decompose over time
- Paper pots: Great for starting seeds, can be planted directly in the ground
- Fabric pots: Promote air pruning of roots and can be reused for years
Encouraging Biodiversity
A diverse ecosystem, even in containers, leads to healthier plants:
- Plant companions: Pair plants that benefit each other (e.g., basil with tomatoes)
- Attract beneficial insects: Grow flowers like marigolds or nasturtiums in some containers
- Microbial diversity: Use compost tea to introduce beneficial microorganisms
Pro Tip: Create a “pollinator pot” with nectar-rich flowers to attract bees and butterflies to your vegetable containers.
By implementing these sustainable practices, you’re not just growing vegetables—you’re nurturing a mini-ecosystem. Your plants will thrive, and you’ll be doing your part for the environment.
Up next, we’ll share some expert tips to take your container vegetable gardening to the next level. Ready to become a container gardening guru?
Expert Tips for Successful Container Vegetable Gardening Soil Management
You’ve got the basics down, but now it’s time to fine-tune your skills. These expert tips will help you master the art of soil management in container vegetable gardening.
Seasonal Considerations for Soil Care
Your soil’s needs change with the seasons. Here’s how to keep up:
-
- Spring: Refresh soil with compost and slow-release organic fertilizer
- Check pH and adjust if necessary
- Ensure proper drainage after winter storage
- Summer: Mulch to retain moisture and keep soil cool
- Monitor for signs of nutrient deficiencies as plants grow rapidly
- Water deeply and consistently
- Fall: Add compost to replenish nutrients used during the growing season
- Plant cover crops in larger containers to protect soil over winter
- Consider soil solarization for pest control
- Winter: Protect containers from freeze-thaw cycles
- If overwintering plants, reduce watering but don’t let the soil dry completely
- Plan next season’s crop rotation
Pro Tip: Keep a garden journal to track seasonal changes and their effects on your plants. This will help you anticipate needs year after year.
Balancing Water Retention and Drainage
Finding the sweet spot between water retention and drainage is crucial for healthy plants:
-
- Layer your container:Bottom: Coarse material like broken pottery or pebbles for drainage
- Middle: Main soil mix
- Top: Fine mulch for water retention
- Use water-retaining amendments: Coconut coir: Holds up to 10 times its weight in water
- Vermiculite: Improves both water retention and aeration
- Monitor container material: Plastic and glazed ceramic retain moisture longer
- Terracotta and unglazed ceramic allow more evaporation
DIY Water Retention Boost: Mix 1 tablespoon of water-retaining polymer crystals per gallon of soil. These absorb water and release it slowly to plant roots.
Maximizing Nutrient Availability
Ensure your plants can access all the nutrients in your soil:
- Maintain proper pH: Most nutrients are available between 6.0-7.0 pH
- Encourage beneficial microorganisms: Apply compost tea monthly
- Avoid over-fertilizing, which can harm soil microbes
- Practice foliar feeding: Spray diluted seaweed extract or compost tea directly on leaves
- Best done early morning or late evening
- Use chelated micronutrients: These forms of iron, manganese, and zinc are more easily absorbed by plants
Expert Hack: Add a handful of mycorrhizal fungi to your soil when planting. These form symbiotic relationships with plant roots, significantly improving nutrient uptake.
Understanding Root Zone Management
The root zone is where the magic happens. Here’s how to optimize it:
- Air pruning: Use fabric pots or air pruning containers to prevent root circling and promote a healthy root system
- Temperature control: Use light-colored containers to reflect heat
- Insulate containers with bubble wrap in cold weather
- Oxygen management: Avoid overwatering, which can lead to anaerobic conditions
- Poke holes in the soil surface periodically to improve aeration
Soil Testing and Adjustment
Regular soil testing is key to maintaining optimal growing conditions:
- Frequency: Test at least once a year, preferably in early spring
- DIY vs. Lab: Home test kits are good for quick checks
- Professional lab tests provide more detailed information
- What to test for pH
- Macronutrients (N-P-K)
- Micronutrients
- Organic matter content
- Making adjustments: Always make gradual changes
- Retest after a few weeks to check the effect of your adjustments
Pro Tip: Keep detailed records of your soil tests and any amendments you make. This will help you track changes over time and fine-tune your soil management.
Companion Planting for Soil Health
Some plants can help improve soil conditions for their neighbors:
- Nitrogen fixers: Plant legumes like beans or peas to add nitrogen to the soil
- Deep rooters: Include plants with deep roots (like tomatoes) to bring up nutrients from lower soil layers
- Soil aerators: Plants with fibrous roots (like lettuce) can improve soil structure
Example Companion Planting Trio: Tomatoes + Basil + Marigolds
- Tomatoes: Main crop
- Basil: Repels pests, improves flavor
- Marigolds: Deter nematodes, attract pollinators
By implementing these expert tips, you’re not just gardening – you’re cultivating a thriving ecosystem in each of your containers. Remember, the key to success is observation and adaptation. Every container is unique, and the best gardeners are those who learn to read their plants and respond to their needs.
Are you ready to wrap up our comprehensive guide to the best soil for container vegetable gardening? Let’s move on to our conclusion and recap the key points we’ve covered.
Conclusion
Congratulations! You’ve just completed a master class in creating and maintaining the best soil for container vegetable gardening. Let’s recap the key points we’ve covered and look at how you can put all this knowledge into practice.
Recap of Key Points
- Soil Components: The ideal container soil mix includes organic matter, drainage materials, and nutrients in the right balance.
- Customization: Different vegetables have unique soil preferences. Tailoring your soil mix to specific plants can significantly boost your garden’s productivity.
- Maintenance: Regular watering, fertilizing, and mulching are crucial for maintaining healthy container soil.
- Troubleshooting: Being able to identify and address common soil issues like compaction, nutrient deficiencies, and pH imbalances is key to a thriving garden.
- Sustainability: Practices like composting, recycling soil, and using organic amendments can make your container garden more eco-friendly and cost-effective.
- Expert Techniques: Seasonal care, root zone management, and companion planting can take your container gardening to the next level.
The Impact of Quality Soil
Remember, the soil in your containers is more than just dirt – it’s the foundation of your entire garden ecosystem. Quality soil:
- Provides essential nutrients for plant growth
- Supports beneficial microorganisms
- Ensures proper water retention and drainage
- Anchors and protects plant roots
- Buffers against environmental stresses
Putting It All Together
Now that you have this knowledge, how can you apply it? Here’s a simple action plan:
- Assess your current setup: Test your soil and evaluate your plants’ health.
- Make a plan: Decide which improvements you want to implement first.
- Start small: Try new techniques with one or two containers before scaling up.
- Observe and adjust: Keep a garden journal to track what works and what doesn’t.
- Continuously learn: Stay curious and keep experimenting with new methods.
Final Thoughts
Container vegetable gardening is both an art and a science. The “best” soil for your garden is one that meets the needs of your specific plants, suits your local climate, and aligns with your gardening goals and values.
Remember, even expert gardeners face challenges and setbacks. The key is to view each challenge as a learning opportunity. Every wilted leaf or stunted plant is just nature’s way of teaching you something new about your garden’s needs.
Pro Tip: Join a local gardening club or online community. Sharing experiences and tips with fellow gardeners can be incredibly valuable and inspiring.
As you continue your container gardening journey, keep experimenting, observing, and most importantly, enjoying the process. There’s something truly magical about nurturing a plant from seed to harvest, especially when you’ve crafted the perfect environment for it to thrive.
So, are you ready to get your hands dirty and create some gardening magic? Your plants are waiting, and with the knowledge you’ve gained, you’re well-equipped to give them the best possible start in life. Happy gardening!